
介绍
ElasticSearch 是一个基于 Lucene 的搜索服务器。它提供了一个分布式多用户能力的全文搜索引擎,基于 RESTful web 接口。Elasticsearch 是用 Java 开发的,并作为 Apache 许可条款下的开放源码发布,是当前流行的企业级搜索引擎。设计用于云计算中,能够达到实时搜索,稳定,可靠,快速,安装使用方便。基百科、Stack Overflow、Github 都采用它。
本文从零开始,讲解如何使用 Elasticsearch 搭建自己的全文搜索引擎。每一步都有详细的说明,大家跟着做就能学会。
环境
1、VMware
2、Centos 6.6
3、Elasticsearch 5.5.2
4、JDK 1.8
VMware 安装以及在 VMware 中安装 Centos 这个就不说了,环境配置直接默认就好,不过分配给机器的内存最好设置大点(建议 2G),
使用 dhclient 命令来自动获取 IP 地址,查看获取的 IP 地址则使用命令 ip addr 或者 ifconfig ,则会看到网卡信息和 lo 卡信息。
给虚拟机额中的 linux 设置固定的 ip(因为后面发现每次机器重启后又要重新使用 dhclient 命令来自动获取 IP 地址)
1 | vim /etc/sysconfig/network-scripts/ifcfg-eth0 |
修改:
1 | onboot=yes |
增加:(下面可设置可不设置)
1 | IPADDR=192.168.1.113 网卡IP地址 |
设置好之后,把网络服务重启一下, service network restart
修改 ip 地址参考: http://jingyan.baidu.com/article/e4d08ffdd417660fd3f60d70.html
大环境都准备好了,下面开始安装步骤:
安装 JDK 1.8
先卸载自带的 openjdk,查找 openjdk
1 | rpm -qa | grep java |
卸载 openjdk
1 | yum -y remove java-1.7.0-openjdk-1.7.0.65-2.5.1.2.el65.x8664 |
解压 JDK 安装包:
附上jdk1.8的下载地址:
http://www.oracle.com/technetwork/java/javase/downloads/jdk8-downloads-2133151.html
解压完成后配置一下环境变量就 ok
1、在/usr/local/下创建Java文件夹
1 | cd /usr/local/ 进入目录 |
2、文件夹创建完毕,把安装包拷贝到 Java 目录中,然后解压 jdk 到当前目录
1 | cp /usr/jdk-8u144-linux-x64.tar.gz /usr/local/java/ **注意匹配你自己的文件名** 拷贝到java目录 |
3、解压完之后,Java目录中会出现一个jdk1.8.0_144的目录,这就解压完成了。之后配置一下环境变量。
编辑/etc/下的profile文件,配置环境变量
1 | vi /etc/profile 进入profile文件的编辑模式 |
之后保存并退出文件之后。
让文件生效:source /etc/profile
在控制台输入Java 和 Java -version 看有没有信息输出,如下: java -version
1 | java version "1.8.0_144" |
能显示以上信息,就说明 JDK 安装成功啦
安装 Maven
因为后面可能会用到 maven ,先装上这个。
1、下载 maven
1 | wget http://mirrors.hust.edu.cn/apache/maven/maven-3/3.2.5/binaries/apache-maven-3.2.5-bin.tar.gz |
2、解压至 /usr/local 目录
1 | tar -zxvf apache-maven-3.2.5-bin.tar.gz |
3、配置公司给的配置
替换成公司给的 setting.xml 文件,修改关于本地仓库的位置, 默认位置: ${user.home}/.m2/repository
4、配置环境变量etc/profile 最后添加以下两行
1 | export MAVEN_HOME=/usr/local/apache-maven-3.2.5 |
5、测试
1 | [root@localhost ~]# mvn -v |
VMware 虚拟机里面的三台机器 IP 分别是:
1 | 192.168.153.133 |
配置 hosts
在 /etc/hosts下面编写:ip node 节点的名字(域名解析)
1 | vim /etc/hosts |
新增:
1 | 192.168.153.133 es1 |
设置 SSH 免密码登录
安装expect命令 : yum -y install expect
将 ssh_p2p.jar 随便解压到任何目录下: (这个 jar 包可以去网上下载)
1 | unzip ssh_p2p.zip |
修改 resource 的 ip 值
1 | vim /ssh_p2p/deploy_data/resource (各个节点和账户名,密码,free代表相互都可以无密码登陆) |
1 | #设置为你每台虚拟机的ip地址,用户名,密码 |
修改 start.sh 的运行权限
1 | chmod u+x start.sh |
运行
1 | ./start.sh |
测试:
ssh ip地址 (测试是否可以登录)
安装 ElasticSearch
下载地址: https://www.elastic.co/downloads/elasticsearch
1 | wget https://artifacts.elastic.co/downloads/elasticsearch/elasticsearch-5.5.2.tar.gz |
su tzs 切换到 tzs 用户下 ( 默认不支持 root 用户)
sh /usr/local/elasticsearch/bin/elasticsearch -d 其中 -d 表示后台启动
在 vmware 上测试是否成功:curl http://localhost:9200/
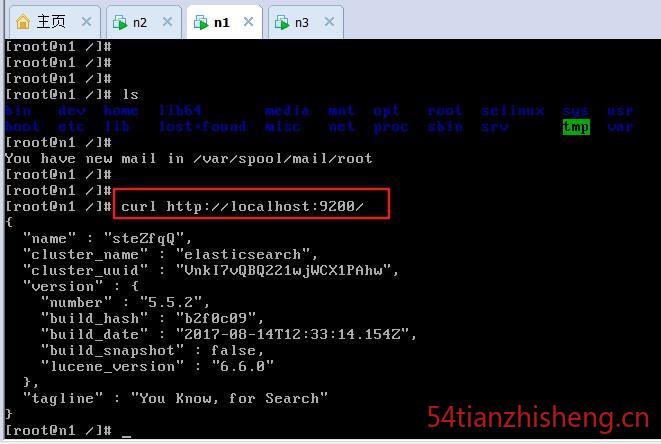
出现如上图这样的效果,就代表已经装好了。
elasticsearch 默认 restful-api 的端口是 9200 不支持 IP 地址,也就是说无法从主机访问虚拟机中的服务,只能在本机用 http://localhost:9200 来访问。如果需要改变,需要修改配置文件 /usr/local/elasticsearch/config/elasticsearch.yml 文件,加入以下两行:
1 | network.bind_host: 0.0.0.0 |
或去除 network.host 和 http.port 之前的注释,并将 network.host 的 IP 地址修改为本机外网 IP。然后重启,Elasticsearch
关闭方法(输入命令:ps -ef | grep elasticsearch ,找到进程,然后 kill 掉就行了。
如果外网还是不能访问,则有可能是防火墙设置导致的 ( 关闭防火墙:service iptables stop )
修改配置文件:vim config/elasticsearch.yml
cluster.name : my-app (集群的名字,名字相同的就是一个集群)
node.name : es1 (节点的名字, 和前面配置的 hosts 中的 name 要一致)
path.data: /data/elasticsearch/data (数据的路径。没有要创建(mkdir -p /data/elasticsearch/{data,logs}),并且给执行用户权限 chown tzs /data/elasticsearch/{data,logs} -R )
path.logs: /data/elasticsearch/logs (数据 log 信息的路径,同上)
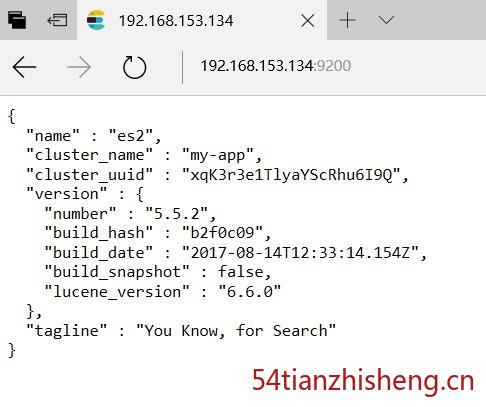
network.host: 0.0.0.0 //允许外网访问,也可以是自己的ip地址
http.port: 9200 //访问的端口
discovery.zen.ping.unicast.hosts: [“192.168.153.133”, “192.168.153.134”, “192.168.153.132”] //各个节点的ip地址
记得需要添加上:(这个是安装 head 插件要用的, 目前不需要)
http.cors.enabled: true
http.cors.allow-origin: “*”
最后在外部浏览器的效果如下图:
安装 IK 中文分词
可以自己下载源码使用 maven 编译,当然如果怕麻烦可以直接下载编译好的
https://github.com/medcl/elasticsearch-analysis-ik/releases/tag/v5.5.2
注意下载对应的版本放在 plugins 目录下
解压
unzip elasticsearch-analysis-ik-5.5.2.zip
在 es 的 plugins 下新建 ik 目录
mkdir ik
将刚才解压的复制到ik目录下
cp -r elasticsearch/* ik
删除刚才解压后的
1 | rm -rf elasticsearch |
IK 带有两个分词器
ik_max_word :会将文本做最细粒度的拆分;尽可能多的拆分出词语
ik_smart:会做最粗粒度的拆分;已被分出的词语将不会再次被其它词语占有
安装完 IK 中文分词器后(当然不止这种中文分词器,还有其他的,可以参考我的文章 Elasticsearch 默认分词器和中分分词器之间的比较及使用方法),测试区别如下:
ik_max_word
curl -XGET ‘http://192.168.153.134:9200/_analyze?pretty&analyzer=ik_max_word‘ -d ‘联想是全球最大的笔记本厂商’
1 | { |
ik_smart
curl -XGET ‘http://localhost:9200/_analyze?pretty&analyzer=ik_smart‘ -d ‘联想是全球最大的笔记本厂商’
1 | { |
安装 head 插件
elasticsearch-head 是一个 elasticsearch 的集群管理工具,它是完全由 html5 编写的独立网页程序,你可以通过插件把它集成到 es。
效果如下图:(图片来自网络)


安装 git
1 | yum remove git |
安装nodejs
先去官网下载 node-v8.4.0-linux-x64.tar.xz
1 | tar -Jxv -f node-v8.4.0-linux-x64.tar.xz |
环境变量设置:
1 | vim /etc/profile |
新增:
1 | export NODE_HOME=/opt/node |
使配置文件生效(这步很重要,自己要多注意这步)
1 | source /etc/profile |
测试是否全局可用了:
1 | node -v |
然后
1 | mv elasticsearch-head head |
再 es 的配置文件中加:
1 | http.cors.enabled: true |
在浏览器打开 http://192.168.153.133:9100/ 就可以看到效果了,
遇到问题
把坑都走了一遍,防止以后再次入坑,特此记录下来
1、ERROR Could not register mbeans java.security.AccessControlException: access denied (“javax.management.MBeanTrustPermission” “register”)
改变 elasticsearch 文件夹所有者到当前用户
sudo chown -R noroot:noroot elasticsearch
这是因为 elasticsearch 需要读写配置文件,我们需要给予 config 文件夹权限,上面新建了 elsearch 用户,elsearch 用户不具备读写权限,因此还是会报错,解决方法是切换到管理员账户,赋予权限即可:
sudo -i
chmod -R 775 config
2、[WARN ][o.e.b.ElasticsearchUncaughtExceptionHandler] [] uncaught exception in thread [main]
org.elasticsearch.bootstrap.StartupException: java.lang.RuntimeException: can not run elasticsearch as root
原因是elasticsearch默认是不支持用root用户来启动的。
解决方案一:Des.insecure.allow.root=true
修改/usr/local/elasticsearch-2.4.0/bin/elasticsearch,
添加 ES_JAVA_OPTS=”-Des.insecure.allow.root=true”
或执行时添加: sh /usr/local/elasticsearch-2.4.0/bin/elasticsearch -d -Des.insecure.allow.root=true
注意:正式环境用root运行可能会有安全风险,不建议用root来跑。
解决方案二:添加专门的用户
1 | useradd elastic |
3、UnsupportedOperationException: seccomp unavailable: requires kernel 3.5+ with CONFIG_SECCOMP and CONFIG_SECCOMP_FILTER compiled in
只是警告,使用新的linux版本,就不会出现此类问题了。
4、ERROR: [4] bootstrap checks failed
[1]: max file descriptors [4096] for elasticsearch process is too low, increase to at least [65536]
原因:无法创建本地文件问题,用户最大可创建文件数太小
解决方案:切换到 root 用户,编辑 limits.conf 配置文件, 添加类似如下内容:
vim /etc/security/limits.conf
添加如下内容:
1 | * soft nofile 65536 |
[2]: max number of threads [1024] for user [tzs] is too low, increase to at least [2048]
原因:无法创建本地线程问题,用户最大可创建线程数太小
解决方案:切换到root用户,进入limits.d目录下,修改90-nproc.conf 配置文件。
vim /etc/security/limits.d/90-nproc.conf
找到如下内容:
- soft nproc 1024
修改为
- soft nproc 2048
[3]: max virtual memory areas vm.max_map_count [65530] is too low, increase to at least [262144]
原因:最大虚拟内存太小
root用户执行命令:
sysctl -w vm.max_map_count=262144
或者修改 /etc/sysctl.conf 文件,添加 “vm.max_map_count”设置
设置后,可以使用
$ sysctl -p
[4]: system call filters failed to install; check the logs and fix your configuration or disable system call filters at your own risk
原因:Centos6不支持SecComp,而ES5.4.1默认bootstrap.system_call_filter为true进行检测,所以导致检测失败,失败后直接导致ES不能启动。
详见 :https://github.com/elastic/elasticsearch/issues/22899
解决方法:在elasticsearch.yml中新增配置bootstrap.system_call_filter,设为false,注意要在Memory下面:
bootstrap.memory_lock: false
bootstrap.system_call_filter: false
5、 java.lang.IllegalArgumentException: property [elasticsearch.version] is missing for plugin [head]
再 es 的配置文件中加:
1 | http.cors.enabled: true |
最后
整个搭建的过程全程自己手动安装,不易,如果安装很多台机器,是否可以写个脚本之类的自动搭建呢?可以去想想的。首发于:http://www.54tianzhisheng.cn/2017/09/09/Elasticsearch-install/ ,转载请注明出处,谢谢配合!